
2-5-2: Arc Sizing
Chapter 2: Basic Editing
|
2-5: Changing Size 2-5-2: Arc Sizing |
|
To change the width of an arc, issue the Interactively command (in menu Edit / Size). Note that the arc stretches about its center so that an edge is at the cursor location. Click a button to make the change. To change the size of more than one arc at a time, select the arcs and use the All Selected Arcs... command.
|
Another way to change an arc's width is to select it and use the Object Properties... command (in menu Edit / Properties). Note that when typing size amounts into a dialog, specify the size of the highlighted area. A CMOS active arc shows highlighting only on its active area, even though the complete arc has implant regions that are much larger. The "Name" field lets you name an arc (see Section 6-8-1). Arc names are only displayed on the arc if they have been explicitly typed into this dialog. You can also use the "Props." button to show a dialog that controls all aspects of a displayed arc name. The "Easy to Select" checkbox enables selection of the arc with a simple click (see Section 2-1-5). | 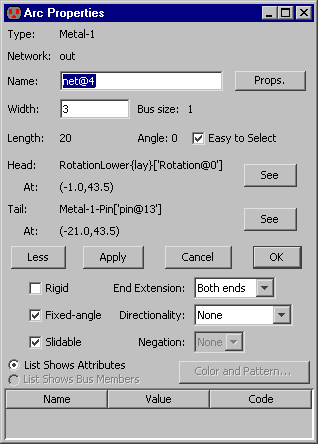 |
Many pieces of state can be changed here, including Rigid and Fixed-angle (see Section 5-2-1), Slidable (see Section 5-2-2), Directionality (see Section 5-4-1), Ends extension (see Section 5-4-3), and Negation (see Section 5-4-2).
When an Artwork arc has been selected (see Section 7-6-1), the "Color and Pattern..." button is available for setting its color.
 |
Previous |  |
Table of Contents | Next |  |