 |
2-5-1: Node Sizing |
|
|
2-5-1: Node Sizing |
|
| The command will show 8 handles around the node, four in the corners and four on the sides. Clicking and dragging on any handle will resize the node appropriately. When you release the button, the node changes size. If multiple nodes are selected, only one has the handles but all are resized. |  |
While stretching the node, hold the Control key to constrain the size to just one axis, and hold the Shift key to constrain the X and Y sizes so that they scale uniformly. If you hold the Control and Shift keys, then the node will resize about its center.
It is recommended that you hold the mouse button down while dragging so you can see the final size of the node. Release the mouse button to actually resize the node. To abort this operation, type Escape.
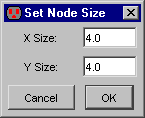 | Another way to change the size of one or more nodes is to select them and use the All Selected Nodes... command (in menu Edit / Size). The dialog allows you to set the X and Y sizes of the selected nodes. If you leave one of these size fields empty, that coordinate is not changed. |
Note that when typing size amounts into a dialog, specify the size of the highlighted area. In a typical MOS transistor, the highlighted area (where active and polysilicon cross) is 2x3, even though the component is much larger if you include the four overlap regions sticking out.
 |
Previous |  |
Table of Contents | Next |  |