 |
1-11-7: Schematics Tutorial: Hierarchy and Icons |
|
|
1-11-7: Schematics Tutorial: Hierarchy and Icons |
|
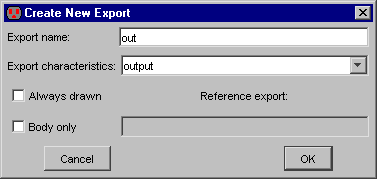 | To see an example of this, select the output port of the Buffer node and issue the Create Export... command (in menu Export). You will be prompted for an export name and its characteristics (set the characteristics to "output"). |
|
The output port on the buffer node is now exported to the outside world. Run a wire from the input side of the And node and export the pin at the end of the wire. Your circuit should look like this. | 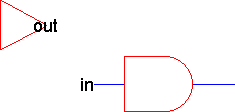 |
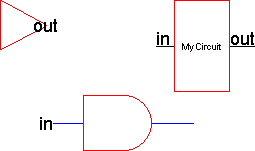 | You can now make an icon for this circuit by using the Make Icon command (in menu View). The icon will be placed in your circuit (you may have to move it away from the rest of the circuitry). The result will look like this. |
|
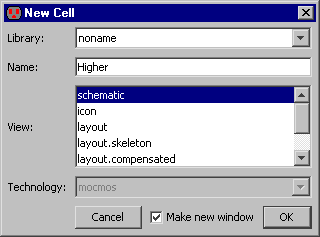
To test this icon in a circuit, create a new cell in which to place instances of the icon.
Use the New Cell... command (in menu Cell).
Type the new cell name ("Higher" is used in the example here) and make sure its view is "schematic".
A new (empty) cell will appear in a separate window.
Try creating a few simple nodes in this new window (place a gate or two).
|  |
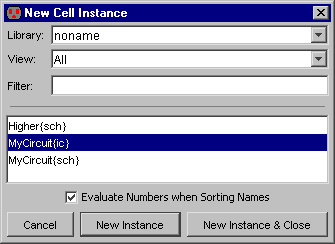 | Now place an instance of the other cell by using the Place Cell Instance... command (in menu Cell). You can also click the "Cell" entry in the component menu. You will be given a list of cells to create: select the one that is in the OTHER window (the one called "MyCircuit{ic}" in this example). Then click in the newer cell to create the instance. |
| The icon that appears is a node in the same sense as the Buffer and And gate: it can be moved, wired, and so on. In addition, because the node contains subcomponents, you can see its contents by selecting it and using the Down Hierarchy command (in menu Cell / Down Hierarchy). Note that if the objects in a cell no longer fit in the display window, use the Fill Window command (in menu Window). |  |
 |
Previous |  |
Table of Contents | Next |  |